Learning how to check tire pressure is one of the easiest, fastest, and most rewarding vehicle maintenance tasks you can perform at home. Your tires are the only physical point of contact between your multi-ton vehicle and the road surface. When that contact patch is compromised by improper inflation, it drastically impacts your vehicle’s handling, braking distance, and overall safety. Despite this, millions of drivers hit the highway every single day with severely underinflated or dangerously overinflated tires simply because they do not know how to perform a basic pressure check.
By taking a few minutes each month to monitor your tires, you can prevent catastrophic blowouts, extend the lifespan of your tread, and significantly improve your gas mileage. You do not need to rely on a mechanic or a dealership to perform this task. This comprehensive guide will teach you exactly how to find your vehicle’s recommended pressure, choose the right tools, measure the air accurately, and adjust the pressure like a seasoned automotive professional.
Quick Facts
- Time Required: 5 to 10 minutes
- Difficulty Level: Beginner
- Tools Needed: A reliable tire pressure gauge, an air compressor (optional for adding air).
The Hidden Dangers of Incorrect Tire Pressure
Before you grab a pressure gauge, it is important to understand why this simple maintenance task matters so much. Tire pressure is not just a suggestion; it is an engineered specification designed to keep you safe under various driving conditions.
Driving on Underinflated Tires
When your tires lack sufficient air, more of the rubber touches the road surface. This creates excessive friction and heat. Over time, this heat buildup degrades the internal structural integrity of the tire, leading to tread separation or a sudden blowout at highway speeds. Underinflation also causes the outer edges of the tire tread to wear down much faster than the center, forcing you to replace the tires prematurely. Furthermore, the added rolling resistance forces your engine to work harder, which actively drains your fuel economy.
Driving on Overinflated Tires
Conversely, putting too much air into your tires is equally dangerous. An overinflated tire bulges in the center, meaning less rubber is actually making contact with the pavement. This drastically reduces your traction, making your vehicle highly susceptible to hydroplaning on wet roads and sliding on ice. Overinflated tires also create a harsh, bumpy ride because the tires become too stiff to absorb the shock of potholes and road imperfections.
Understanding PSI (Pounds per Square Inch)
In the United States, tire pressure is universally measured in PSI, which stands for Pounds per Square Inch. This metric simply describes the amount of force the compressed air inside the tire is exerting outward against one square inch of the tire’s inner rubber wall.
Automotive engineers spend thousands of hours testing vehicles to determine the exact PSI required to balance comfort, fuel economy, load-bearing capacity, and traction. For most standard passenger cars, this sweet spot usually falls somewhere between 30 PSI and 35 PSI. However, larger pickup trucks and SUVs carrying heavy loads may require tire pressures of 45 PSI or even higher.
Where to Find Your Vehicle’s Recommended PSI
One of the most common mistakes inexperienced drivers make is looking in the wrong place to find their recommended tire pressure. You should never guess your PSI, and you should not rely on generic advice from the internet, as every vehicle weight class is different.
There are two main places where PSI numbers are printed on your vehicle, but only one of them is the correct number to follow.
| Information Source | What It Tells You | Should You Use This Number? |
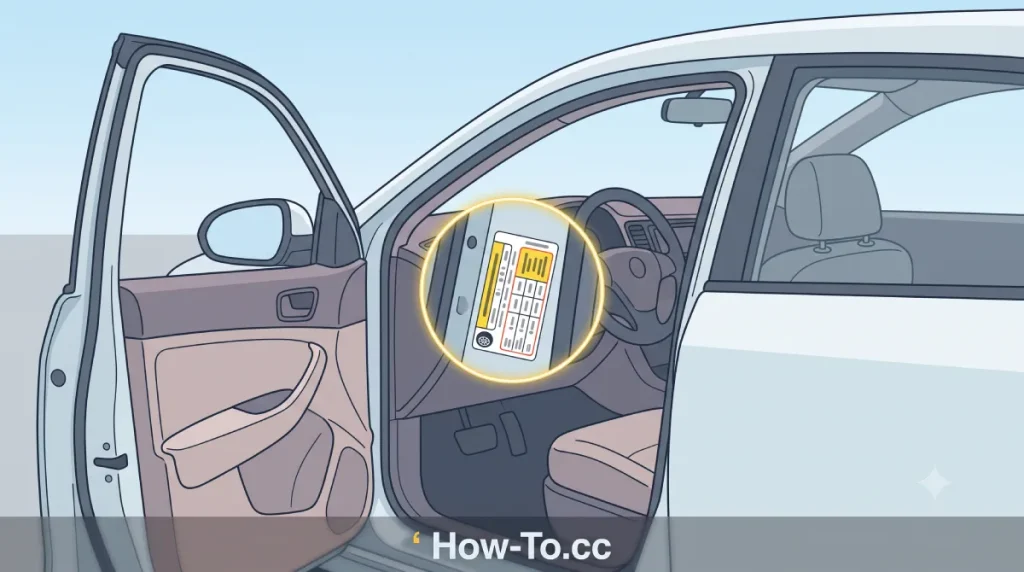
| Driver’s Side Door Jamb Sticker | The manufacturer’s exact recommended PSI for your specific vehicle based on its weight and suspension. | Yes. Always follow the numbers printed on this yellow and white placard. |
| The Tire Sidewall | The absolute maximum pressure the tire can physically hold before bursting. | No. Inflating to this number will result in a dangerously overinflated tire. |
| Vehicle Owner’s Manual | Detailed pressure specifications, including adjustments for towing heavy loads or carrying extra passengers. | Yes. Consult the manual if you are towing a trailer or carrying heavy cargo. |
To find your target number, open the driver’s side door and look at the metal frame (the B-pillar). You will see a sticker listing the recommended cold tire pressure for both the front and rear tires. Keep in mind that some vehicles require different pressures for the front tires compared to the rear tires.
Choosing the Right Tire Pressure Gauge
To check your air levels, you need a dedicated tire pressure gauge. While some gas station air compressors have built-in gauges, they are notoriously inaccurate due to heavy use and abuse by the general public. Keeping a personal gauge in your glovebox ensures you always get a reliable reading.
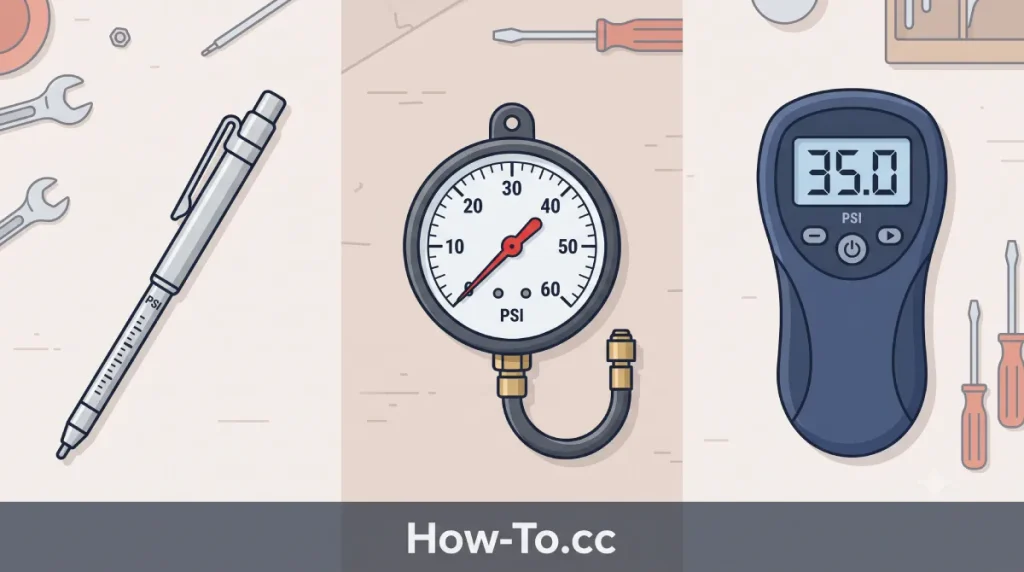
There are three primary types of gauges available at any local auto parts store.
1. Stick (Pencil) Gauges
These are the most common, affordable, and compact gauges on the market. They look like a silver metal pen. When you press the gauge onto the tire valve, the air pressure pushes a numbered white plastic stick out of the bottom. While they are cheap and require no batteries, they can be slightly difficult to read perfectly accurately, and the internal spring can wear out over the years.
2. Dial (Analog) Gauges
Dial gauges feature a round clock-like face with a needle that points to the specific PSI number. They often come with a short flexible hose, making it easier to attach them to awkwardly positioned valve stems. These are highly accurate and very easy to read, though they are slightly bulkier to store in a standard glove compartment.
3. Digital Gauges
Digital gauges utilize an electronic sensor to read the air pressure and display the exact PSI on an illuminated LCD screen. These are widely considered the most accurate and easiest to read, especially in the dark or during nighttime roadside emergencies. The only drawback is that they require small batteries that will eventually need to be replaced.
Step-by-Step Guide: How to Check Tire Pressure
Now that you understand the mechanics and have the correct tools, it is time to get your hands dirty. Follow these simple steps to ensure you get a highly accurate reading every single time.
Step 1: Start With Cold Tires
The physical state of air changes drastically with temperature. When you drive, the friction between the rubber and the asphalt generates heat. This heat causes the air inside the tire to expand, which temporarily raises the PSI reading. If you check your tires immediately after a long highway drive, the gauge will give you a falsely high reading.
To get an accurate measurement, you must check your tires when they are “cold.” This means the vehicle has been parked for at least three hours, or you have driven it for less than one mile at low city speeds. The best time to check your tire pressure is first thing in the morning before you leave for work.
Step 2: Locate the Valve Stem
Walk to one of your tires and look around the outer edge of the metal or alloy wheel. You will see a small, black rubber tube sticking out, usually about an inch long. This is called the Schrader valve stem, and it is the only gateway for air to enter or exit your tire.
Step 3: Remove the Valve Cap
Twist the small plastic cap on top of the valve stem counter-clockwise to remove it. Place the cap safely in your pocket or on a clean surface so you do not lose it. While these plastic caps do not hold the high-pressure air inside the tire, they perform the vital job of keeping dirt, road salt, and moisture out of the delicate valve mechanism.
Step 4: Press the Gauge Onto the Valve
Take your tire pressure gauge and press the open end squarely and firmly onto the exposed metal tip of the valve stem. You might hear a brief hissing sound as the air escapes for a fraction of a second. Push down firmly until the hissing stops entirely, creating a tight seal between the gauge and the valve.
Step 5: Read the Measurement
If you are using a stick gauge, look at the highest number visible on the plastic stick that popped out. If you are using a dial or digital gauge, simply read the number displayed on the screen or faceplate. Memorize this number or write it down on a piece of paper.
Step 6: Compare and Adjust
Compare the number you just read on your gauge to the recommended PSI number printed on the sticker inside your driver’s side door jamb.
- If the numbers match perfectly, your tire is good to go.
- If your gauge reading is lower than the door sticker, you need to add air.
- If your gauge reading is higher than the door sticker, you need to release air.
Step 7: Replace the Valve Cap and Repeat
Once you are satisfied with the reading, twist the plastic valve cap back onto the stem securely by turning it clockwise. Do not use pliers to tighten it; hand-tight is perfectly fine. Repeat this exact process for the remaining three tires. Finally, do not forget to check the pressure of your spare tire located in the trunk. Spare tires lose air over time just like regular tires, and a flat spare is useless in an emergency.
How to Add Air Using a Gas Station Compressor
If you discover your tires are underinflated, you will need to find an air compressor. Most local gas stations have a public air and water station located near the edge of the parking lot.
Pull your car close enough so the air hose can easily reach all four tires. Remove the valve caps before you start the machine to save time. Insert your coins or tap your credit card to activate the compressor. Take the metal nozzle at the end of the hose and press it firmly onto your valve stem, just like you did with your pressure gauge.
You will hear the air forcefully pushing into the tire. Hold it there for about five to ten seconds, then remove the hose and use your personal gauge to check the progress. Continue adding air in short bursts, checking frequently, until you hit the exact target PSI printed on your door jamb.
How to Release Air if the Tire is Overinflated
If you accidentally pump too much air into the tire, or if a mechanic overinflated them during your last oil change, you need to bleed the excess pressure out.
Look closely at the metal tip of your valve stem. You will see a tiny metal pin located directly in the center. If you press this pin inward, air will rapidly escape. Most stick and dial tire pressure gauges have a small, built-in metal nub on the back of the head specifically designed to press this pin.
Gently press the center pin to release a burst of air. Let it hiss for two or three seconds, stop, and immediately recheck the pressure with your gauge. Repeat this careful bleeding process until the gauge reads the exact correct PSI.
How Weather and Temperature Affect Tire Pressure
Tire maintenance is not a “set it and forget it” task, largely because of the weather. Air is a gas, which means it expands when heated and contracts when cooled.
As a general rule of thumb in the automotive industry, your tires will gain or lose roughly 1 PSI for every 10 degrees Fahrenheit shift in the ambient temperature. When winter arrives and the temperature drops by 30 degrees, your tires will naturally lose about 3 PSI, even if they have absolutely no leaks. This is why the first freezing morning of the year usually triggers the low tire pressure warning lights in millions of cars across the country.
Conversely, during intense summer heatwaves, the hot asphalt will cause the air inside your tires to expand rapidly. This makes checking your pressure at the start of every changing season absolutely essential for maintaining proper handling.
Understanding the TPMS Dashboard Light
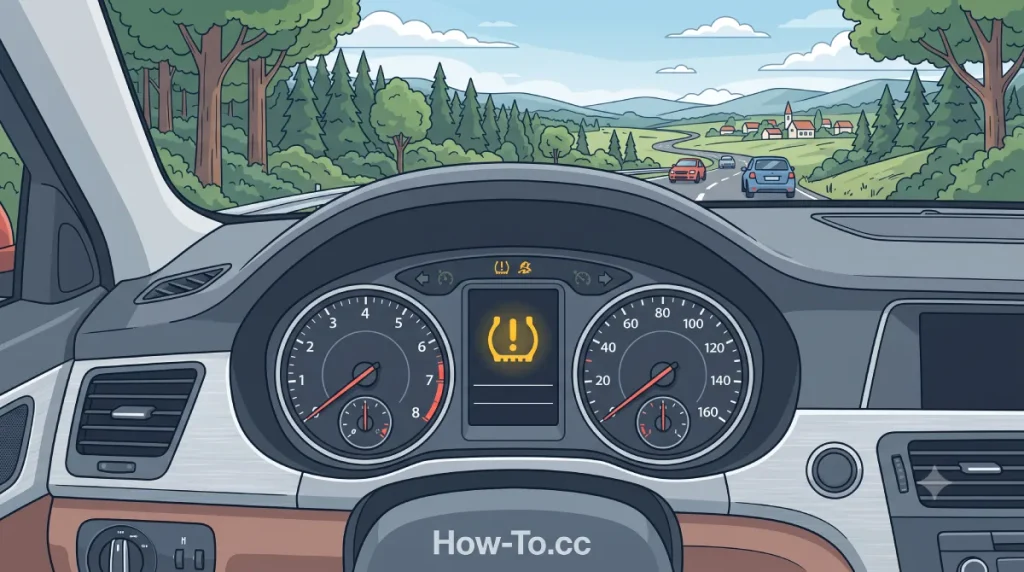
Since 2008, every new vehicle sold in the United States has been legally mandated to include a Tire Pressure Monitoring System (TPMS). When you look at your dashboard, you might occasionally see a yellow light that looks like a horseshoe with an exclamation point in the center. This is your TPMS warning light.
When this light illuminates, it means the vehicle’s computer has detected that at least one of your tires has dropped significantly below the recommended PSI (usually a drop of 25% or more).
If this light turns on while you are driving, do not panic, but do not ignore it. Grip the steering wheel firmly, avoid sudden braking, and pull over safely at the nearest gas station or parking lot. Use your personal gauge to identify which tire is low. Keep in mind that the TPMS is a safety net, not a replacement for manual checks. By the time the light turns on, your tire is already severely underinflated.
Nitrogen vs. Regular Compressed Air
When you visit a high-end tire shop, they may offer to fill your new tires with pure nitrogen instead of regular compressed air, usually denoted by a green valve cap. Regular compressed air is already about 78% nitrogen, with the rest being oxygen and trace moisture.
Pure nitrogen molecules are slightly larger than oxygen molecules, which means they seep through the microscopic pores of the tire rubber at a much slower rate. Furthermore, pure nitrogen is dry, meaning it does not contain the moisture that causes pressure fluctuations during extreme temperature changes. While nitrogen is highly beneficial for race cars and airplanes, for the average daily commuter, standard compressed air is perfectly adequate—provided you check your pressure regularly.
Frequently Asked Questions (FAQs)
How often should I manually check my tire pressure?
Automotive experts highly recommend checking your tire pressure at least once a month. You should also perform a complete pressure check on all four tires and your spare before embarking on any long road trip.
Why is only one of my tires constantly losing pressure?
If three tires maintain their pressure but one consistently drops, you likely have a slow leak. This is usually caused by a small puncture from a nail or screw embedded in the tread. It can also be caused by a failing rubber valve stem or corrosion along the rim preventing a tight bead seal. Have a professional tire shop inspect the leaking tire immediately.
Can I check my tire pressure if I have been driving for an hour?
You can check it in an absolute emergency, but the reading will not be accurate. Driving generates intense heat, expanding the air inside. If you must check a hot tire, expect the reading to be about 3 to 5 PSI higher than the recommended cold pressure. Do not release air from a hot tire to match the cold PSI sticker, as it will be dangerously underinflated once it cools down.
Is it safe to drive on a tire with 15 PSI?
No. Driving on a tire with a pressure that low is extremely dangerous. The tire lacks the structural rigidity to support the weight of the vehicle, which can cause the rubber bead to unseat from the metal wheel entirely, leading to a sudden and complete loss of control. Add air immediately before driving at normal speeds.
Taking five minutes out of your month to monitor your tires is the easiest way to ensure your vehicle remains safe, efficient, and reliable. Keep a high-quality gauge in your car, pay attention to the changing seasons, and never ignore your dashboard warning lights. Share this guide with new drivers in your family to ensure they know how to handle this essential vehicle maintenance task. Do you prefer using a digital gauge or an analog dial? Drop your preference in the comments below!