Learning how to change oil is one of the most rewarding and practical DIY skills any vehicle owner can master. Engine oil is the lifeblood of your car, responsible for keeping complex internal components lubricated, cool, and clean. While visiting a quick-lube shop or dealership is convenient, performing this essential maintenance task at home saves you significant money over the lifespan of your vehicle. More importantly, doing it yourself ensures the job is done right, using high-quality materials without the pressure of upselling mechanics.
If you have never picked up a wrench before, the process might seem intimidating. However, with the right tools, a bit of patience, and strict adherence to safety protocols, you can easily complete this task in your own driveway or garage. This comprehensive guide will walk you through every single phase of the process, from selecting the correct viscosity to safely disposing of the old fluid.
Quick Facts
- Time Required: 30 to 45 minutes
- Difficulty Level: Beginner to Intermediate
- Tools Needed: Jack and jack stands, socket wrench set, oil filter wrench, drain pan, funnel, clean rags, new oil, new oil filter.
The Crucial Role of Engine Motor Oil
Before diving into the mechanical steps, it is essential to understand why fresh oil is so critical to your engine’s survival. Inside your vehicle’s engine, thousands of metal parts are moving at incredibly high speeds. Without proper lubrication, the severe metal-on-metal friction would generate enough heat to literally weld the engine block together, destroying the motor in a matter of minutes.
Fresh engine oil creates a microscopic protective barrier between these fast-moving components. Beyond simple lubrication, modern motor oil serves several other vital functions. It absorbs heat from the combustion chamber and carries it to the oil pan where it can cool. It also contains specialized detergents that clean microscopic soot, dirt, and metal shavings, carrying them safely to the oil filter.
Over time, constant exposure to extreme heat and pressure causes the oil to break down. The chemical structure degrades, the fluid loses its viscosity, and it becomes saturated with debris. When oil turns into a thick, black sludge, it can no longer protect your engine. This is why regular oil changes are the single most important factor in extending the life of your vehicle.
Knowing When to Change Your Oil
For decades, the standard advice across the automotive industry was to change your oil every 3,000 miles or three months. Today, this rule is largely obsolete due to massive advancements in engine manufacturing and synthetic oil chemistry. Most modern vehicles can easily travel between 5,000 and 10,000 miles before requiring an oil change.
However, your specific maintenance interval depends entirely on two factors: the manufacturer’s recommendation and your driving habits. You should always consult your vehicle owner’s manual to find the exact mileage interval recommended for your specific make and model.
You must also consider whether you fall under “normal” or “severe” driving conditions. Severe driving includes frequent short trips of less than five miles, constant stop-and-go city traffic, towing heavy loads, or driving in extremely dusty environments. If your daily commute matches these severe conditions, you will need to change your oil much more frequently to prevent premature engine wear.
How to Choose the Best Engine Oil
Walking down the automotive aisle at your local parts store can be overwhelming due to the sheer variety of oils available. Selecting the right fluid requires understanding two main concepts: the type of oil and the viscosity grade.
Understanding Oil Types
There are four primary categories of engine oil available on the market. Selecting the right one depends on your budget, your vehicle’s age, and the manufacturer’s strict requirements.
| Oil Type | Characteristics and Benefits | Best Suited For |
| Conventional Oil | Derived directly from crude oil with basic additives. It is the most affordable option but breaks down the fastest under high heat. | Older vehicles with simple engine designs and low-mileage drivers. |
| Full Synthetic Oil | Chemically engineered in a laboratory for maximum purity. Offers superior high-temperature protection, better cold starts, and lasts significantly longer. | Modern vehicles, high-performance engines, and extreme weather climates. |
| Synthetic Blend | A mixture of conventional and synthetic oils. It provides better protection than conventional oil at a lower price point than full synthetic. | Drivers wanting a middle-ground upgrade for standard commuting. |
| High Mileage Oil | Contains special seal conditioners designed to swell aging engine gaskets and prevent minor oil leaks. | Vehicles with more than 75,000 miles on the odometer. |
Decoding Viscosity Grades
Viscosity refers to the thickness of the oil and its resistance to flow. On every bottle of oil, you will see a rating such as 5W-30 or 0W-20. The number preceding the “W” (which stands for Winter) indicates how the oil flows in freezing temperatures. A lower number means the oil remains thin and flows quickly during cold morning starts, protecting the engine instantly.
The second number indicates the oil’s thickness at normal operating temperatures (usually around 212°F or 100°C). A higher number means the oil remains thicker under extreme heat, providing a stronger protective film. You must absolutely use the specific viscosity grade printed on your oil filler cap or listed in your owner’s manual. Using the wrong viscosity can trigger check engine lights and cause catastrophic damage to variable valve timing systems.
Essential Tools and Materials You Will Need
Preparation is the key to a smooth and stress-free maintenance session. Before you slide under your vehicle, ensure you have gathered all the necessary supplies. Stopping halfway through the job because you are missing a simple tool can turn a quick chore into a frustrating day.
| Essential Tool / Material | Purpose During the Oil Change |
| Jack and Jack Stands | Safely lifting and supporting the weight of the vehicle. |
| Socket Wrench Set | Removing and tightening the oil pan drain plug. |
| Oil Filter Wrench | Loosening stubborn or over-tightened oil filters. |
| Low-Profile Drain Pan | Catching the old oil as it drains from the engine block. |
| Clean Funnel | Pouring the fresh oil into the engine without spilling. |
| Fresh Motor Oil | Check your manual for the exact quart capacity and viscosity. |
| New Oil Filter | Ensure you buy the exact part number for your vehicle. |
| Shop Towels or Rags | Cleaning up inevitable drips and wiping surfaces clean. |
Safety Precautions Before You Begin
Working underneath a vehicle weighing several thousand pounds carries inherent risks. Safety must always be your absolute priority. Never rely on the hydraulic floor jack alone to hold the car up. Hydraulic seals can fail without warning, causing the car to drop instantly.
Always secure the vehicle by placing heavy-duty jack stands under the manufacturer-approved support points along the car’s frame. Additionally, use wheel chocks behind the rear tires to prevent the car from rolling backward while the front end is elevated.
Furthermore, consider the temperature of the engine. While warm oil drains faster and carries more suspended contaminants out of the pan, hot oil can cause severe burns. If you have just finished a long drive, allow the vehicle to sit for at least 30 to 45 minutes before attempting to touch the drain plug or the exhaust components nearby.
Step-by-Step Guide: How to Change Oil Like a Professional
With your tools gathered, the correct oil purchased, and the vehicle safely secured, you are ready to begin the hands-on process. Follow these detailed steps carefully to ensure a clean, efficient, and successful oil change.
Step 1: Warm Up the Engine
If the car has been sitting overnight, the oil will be thick and cold, meaning it will drain very slowly. Start the engine and let it idle for about three to five minutes. This warms the oil just enough to make it flow smoothly, helping to flush out the maximum amount of old sludge. Turn the engine off and remove the keys from the ignition before proceeding.
Step 2: Lift and Secure the Vehicle
Drive the car onto a set of heavy-duty ramps, or use a floor jack to lift the front end. Once lifted, immediately place your jack stands under the vehicle’s structural pinch welds or subframe. Lower the car slowly until its weight rests entirely on the solid jack stands. Give the car a firm shake to ensure it is completely stable before you crawl underneath.
Step 3: Locate the Drain Plug and Oil Filter
Slide under the vehicle and locate the oil pan. This is typically a large metal or hard plastic reservoir located directly beneath the engine block. At the lowest point of this pan, you will find a single bolt known as the drain plug. Nearby, you should also spot the oil filter, which looks like a cylindrical metal can (spin-on filter) or a plastic cap covering a paper element (cartridge filter).
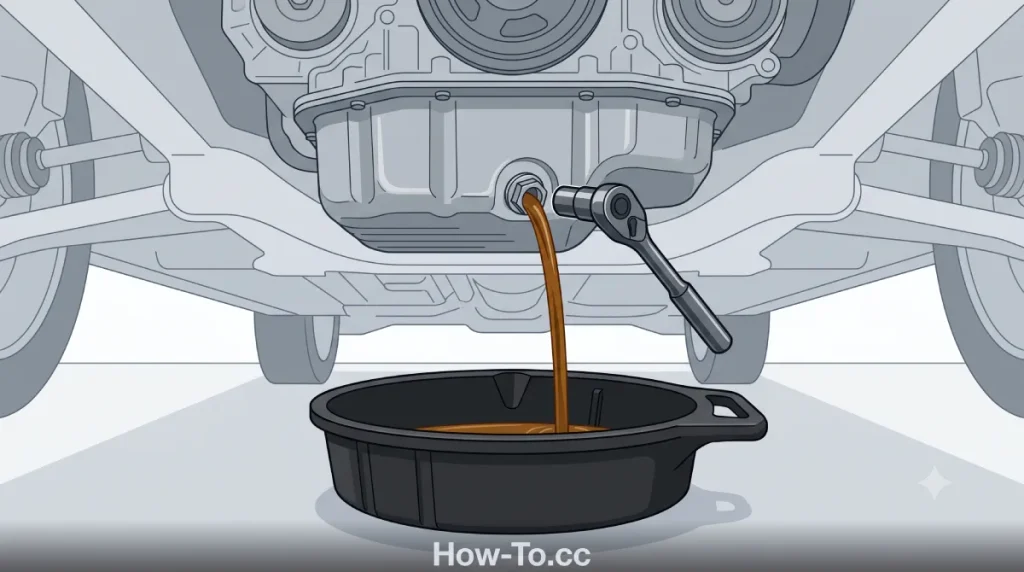
Step 4: Position the Drain Pan
Place your plastic drain pan directly underneath the drain plug. Be mindful that the oil will not drop straight down; it will shoot outward in an arc due to gravity and pressure. Position the pan slightly forward to catch the initial stream, and be prepared to slide it backward as the flow slows down to a trickle.
Step 5: Remove the Drain Plug
Attach the correct size socket to your wrench and place it on the drain plug. Turn the wrench counter-clockwise to break the bolt loose. Once it is loose, switch to using your bare hands. Push inward against the pan while unscrewing the bolt to prevent the oil from leaking past the threads prematurely. Once the threads are fully unscrewed, quickly pull your hand away to let the oil flow cleanly into the pan.
Step 6: Let the Old Oil Drain Completely
Allow the old fluid to drain undisturbed for at least ten to fifteen minutes. While waiting, move to the top of the engine bay and remove the main oil filler cap. Opening this cap allows air to flow into the engine, acting like a vent that helps the remaining oil drain out of the bottom much faster.
Step 7: Inspect and Reinstall the Drain Plug
While the oil is draining, inspect the drain plug. Many plugs feature a magnetic tip designed to catch microscopic metal shavings. Wipe it completely clean with a rag. You must also inspect the crush washer (a small metal or copper gasket sitting on the plug). It is highly recommended to replace this washer with a new one every time to prevent slow leaks. Once the oil has slowed to a minor drip, thread the plug back into the pan by hand to avoid cross-threading, then tighten it securely with your wrench. Do not over-tighten, as stripping the oil pan threads is an expensive mistake.
Step 8: Remove the Old Oil Filter
Move your drain pan directly underneath the oil filter. Grip the filter with your hands and twist it counter-clockwise. If it is stuck, use your oil filter wrench to gain leverage. As it loosens, oil will begin to spill down the sides. Spin it off completely and dump the heavy, oil-filled filter upside down into your drain pan.
Step 9: Prepare and Install the New Oil Filter
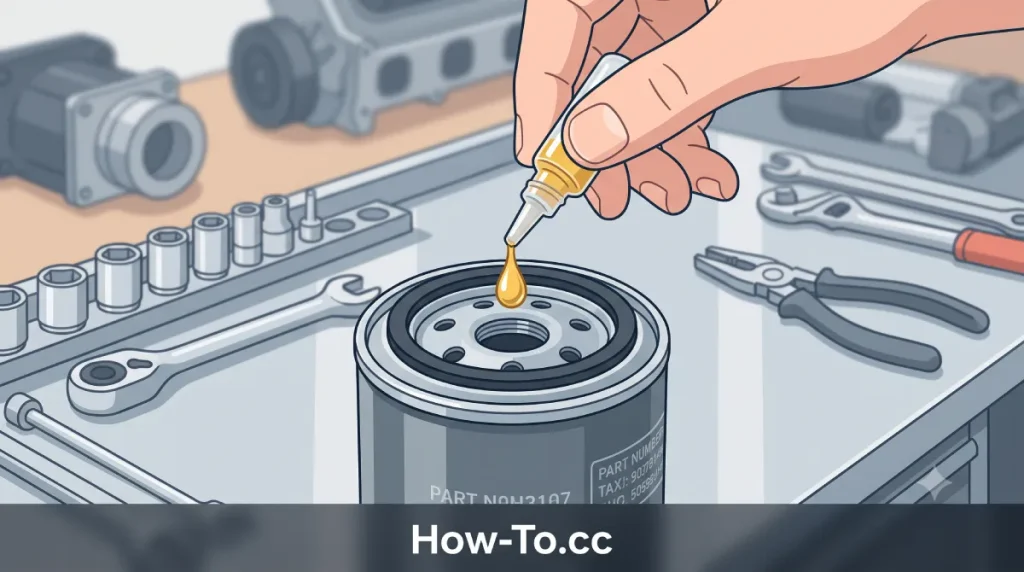
This is a critical step. Dip your finger into the fresh, new motor oil and smear a light coat of it all around the rubber O-ring gasket on top of the new filter. This lubrication prevents the gasket from bunching up and ensures a tight seal.
Take a clean rag and wipe the mounting surface on the engine block completely clean. Crucial check: Ensure the old rubber gasket from the previous filter is not stuck to the engine block. If you accidentally stack two gaskets on top of each other, all of your new oil will violently spray out the moment you start the car. Spin the new filter onto the threads by hand. Tighten it until the rubber gasket makes contact with the metal, then give it another three-quarters of a turn. Never use a wrench to tighten a new oil filter; hand-tight is perfectly sufficient.
Step 10: Refill the Engine With Fresh Oil
Slide out from under the car and stand over the engine bay. Place a clean plastic funnel into the main oil filler hole. Slowly pour in the required amount of fresh oil as specified in your owner’s manual. Pour slowly to prevent the funnel from overflowing and spilling oil onto the hot exhaust manifold, which causes foul smoke. Once you have added the correct amount, remove the funnel and secure the oil filler cap tightly.
Step 11: Check the Final Oil Level
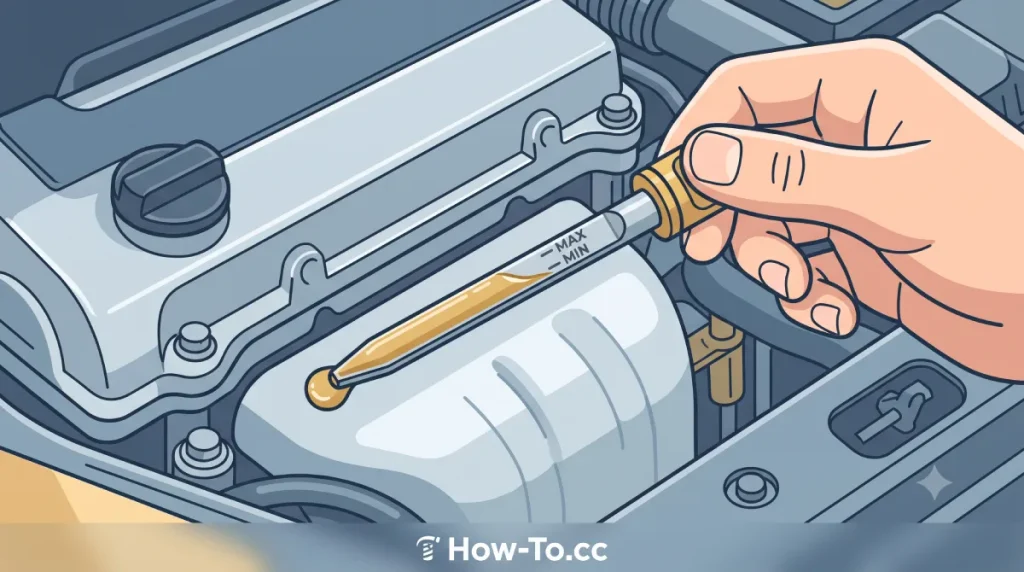
Pull out the engine oil dipstick, wipe it completely clean with a rag, and insert it all the way back into its tube. Pull it out one more time and inspect the tip. The fresh, golden-colored oil should reach the “Full” or “Max” indicator line. If it is slightly low, add a few more ounces until the level is perfect.
Step 12: Start the Engine and Inspect for Leaks
Start your vehicle and let it idle. Look closely at your dashboard; the red low oil pressure warning light should turn off within three seconds. While the engine is running, carefully look underneath the car with a flashlight. Verify that there are absolutely no drips coming from the drain plug or the new oil filter. If everything is completely dry, turn off the engine and safely lower the car off the jack stands.
Common Oil Change Mistakes to Avoid
Even experienced DIYers can occasionally make errors. Being aware of the most common pitfalls will help you avoid costly mechanical damage.
Overfilling the Engine: Pouring too much oil into the engine is just as dangerous as not having enough. Excess oil gets whipped by the spinning crankshaft into a foamy consistency. This foam contains air pockets and cannot properly lubricate bearings, leading to catastrophic engine failure. Always check the dipstick carefully.
Cross-Threading the Drain Plug: If you use a heavy wrench to force the drain plug back into the pan crookedly, you will destroy the delicate threads. Always start threading the bolt using only your fingers. It should spin smoothly for several rotations before you ever need to attach a tool.
Using the Wrong Viscosity: Modern engines utilize complex variable valve timing (VVT) solenoids that operate based on very specific oil pressures. Pushing heavy 10W-40 oil through a system designed for ultra-thin 0W-20 can cause the engine to misfire, run poorly, and ultimately fail. Stick strictly to the manufacturer’s specifications.
How to Responsibly Dispose of Old Oil
You have successfully completed the job, but the task is not truly finished until you handle the waste responsibly. Used motor oil is a highly toxic substance filled with heavy metals and harmful chemicals. Pouring it down a storm drain, into the soil, or throwing it in the household trash is not only terrible for the environment, but it is also highly illegal in most jurisdictions.
Carefully pour the dirty oil from your drain pan into an empty, sealable container. Heavy-duty plastic jugs or the empty bottles from your new oil work perfectly. Place the old oil filter in a sealed plastic bag. Take these items to your local auto parts store (such as AutoZone, O’Reilly Auto Parts, or Advance Auto Parts) or a municipal hazardous waste facility. Most of these locations will accept and recycle your used motor oil completely free of charge.
Frequently Asked Questions (FAQs)
Can I mix synthetic and conventional motor oil together?
Yes, it is generally safe to mix synthetic and conventional oils in a pinch, as they are compatible with one another. However, doing so dilutes the superior performance and temperature resistance of the synthetic oil. It is always best to use one consistent type of fluid for the entire system.
Do I really need to change my oil filter every single time?
Absolutely. The oil filter acts as the kidney of your engine, trapping microscopic dirt and metal shavings. If you put fresh, clean oil through a dirty, clogged filter, the new fluid will instantly become contaminated, completely defeating the purpose of the maintenance. Always replace both the fluid and the filter simultaneously.
What happens if I never change my engine oil?
If ignored for too long, the oil will break down entirely and turn into a thick, abrasive sludge. The engine parts will experience extreme friction, leading to severe overheating. Eventually, the internal components will warp, break, or seize completely, requiring a full engine replacement that can cost thousands of dollars.
How long does an oil change take for a beginner?
If it is your very first time performing this task, you should block out roughly an hour to allow for setup, careful reading of instructions, and cleanup. Once you are familiar with the location of your drain plug and filter, the entire process can easily be completed in under 30 minutes.
Taking charge of your vehicle’s maintenance is an empowering experience. By changing your own oil, you build confidence, save hard-earned money, and ensure your car receives the highest quality care possible. If you found this step-by-step automotive guide helpful, consider bookmarking it for your next scheduled maintenance, and feel free to leave a comment below with your own DIY garage tips!